วันอังคารที่ 27 มีนาคม พ.ศ. 2555

ความรู้ทั่วไปเกี่ยวกับการประกอบเครื่อง โดยอาจารย์โจ้

 ความรู้ทั่วไปเกี่ยวกับการประกอบเครื่อง โดยอาจารย์โจ้

from http://www.subaruclubthailand.com/viewtopic.php?t=6465&sid=4ed53be5c260b524d55b0f6ef3b40ab9

ขออนุญาตอธิบายเรื่องการประกอบเครื่องให้ฟังนะครับ เพื่อจะได้เเข้าใจประเด็นปัญหาของกระทู้นี้มากยิ่งขึ้น รู้ไว้ใช่ว่า ใส่บ่าเอาไปทิ้งก็ได้ Very Happy


ตามมาตรฐานของการประกอบเครื่องไม่ว่าจะเป็นการโอเวอร์ฮอลหรือโมดิฟายอะไรก็ แล้วแต่ เมื่อเราถอดชิ้นส่วนต่างๆ ออกจากกันแล้ว ช่างจะต้องทำการวัดขนาด และค่า clearance ในทุกจุดที่เกี่ยวข้อง อย่างกรณีที่ถอดเอาเสื้อสูบออกไปคว้านนั้นถือว่าแทบจะต้องวัดกันทั้งตัวล่ะ ครับถ้าจะเอาละเอียดกันจริงๆ อันดับแรกหลังจากกลับมาจากโรงกลึงคือต้องวัดขนาดกระบอกสูบครับ ตามมาตรฐานก็ใช้ bore gauge วัดกันตามแนวยาวและตามขวางตั้งฉากกัน 90 องศา วัดกันที่ระดับความลึกตามที่ manual กำหนดไว้อาจจะ 3 ถึง 4 ระดับความลึก และสำคัญอีกอย่างคือขณะที่ทำการวัดขนาดนั้นอุณหภูมิต้องเป็นไปตามค่าทีี่ manual กำหนดไว้ครับ เพราะการวัดที่อุณหภูมิแตกต่างกันค่าก็ออกมาไม่เท่ากันครับ ทำทั้งหมดเพื่อเช็คขนาดเส้นผ่าศูนย์กลางในแต่ละจุด เพื่อดูว่าค่าได้มาตรฐานไหม หลักๆ ก็เพื่อที่จะเช็คความกลม กับการเป็นเทเปอร์ของการคว้านนี่แหละครับ โรงงานจะกำหนดค่า tolerance มาให้ ถ้าวัดแล้วไม่อยู่ในค่าที่กำหนดก็ใช้ไม่ได้ครับ แปลว่างานคว้านไม่ได้มาตรฐานพอ (การวัดค่าแบบนี้ใช้เพื่อพิจารณาว่าจะต้องคว้านกระบอกสูบหรือไม่ในกรณีที่ เราจะโอเวอร์ฮอลเครื่องด้วยครับ มันเป็น process แบบเดียวกัน)

ต่อมาก็คือการวัดขนาดลูกสูบ การวัดขนาดก็จะใช้ micro meter ในการวัดขนาดเส้นผ่าศูนย์กลางของลูกสูบ เวลาวัดก็ต้องวัดขนาดตรงจุดที่ manual กำหนดไว้นะครับ ไม่ใช่นึกจะวัดตรงไหนก็ได้ หากลูกไหนค่าไม่อยู่ในเกณฑ์บวกลบตามมาตรฐานที่ manual กำหนดก็ใช้ไม่ได้ครับ เช่นเดียวกันกับการวัดขนาดในส่วนอื่นๆ คือต้องทำการวัดขณะที่มีอุณหภูมิตามที่ manual กำหนดเช่นกันครับ (ต่อไปให้รู้ไว้เลยว่าเวลาวัดค่าจะต้องควบคุมอุณหภูมิในการวัดเสมอนะครับ)

พอเราได้ขนาดของทั้งกระบอกสูบและขนาดของลูกสูบเราก็จะมาเปรียบเทียบกันว่า ได้ค่า clearance ระหว่างกระบอกสูบกับลูกสูบเป็นเท่าไหร่ ถ้าไม่อยู่ในค่าที่ manual กำหนดไว้ก็ใช้ไม่ได้ครับ ถ้าเป็นการโอเวอร์ฮอลเราก็จะพิจารณาว่าเราจำเป็นต้องเปลี่ยนลูกสูบหรือไม่ กระบอกสูบต้องคว้านหรือไม่

ต่อมาเป็นการวัดแหวนลูกสูบ เวลาวัดแหวนลูกสูบไม่ว่าจะเป็นแหวนอัดหรือแหวนกวาดน้ำมันก็จะใช้วิธีวัดระยะ ห่างของปากแหวนครับ โดยใช้เครื่องมือวัดคือ thickness gauge หรือฟีลเลอร์เกจวัดที่ช่องว่างระหว่างปากแหวน โดยเราจะเอาแหวนใส่ลงไปในกระบอกสูบที่ความลึกระดับหนึ่งตาม manual กำหนดแล้วทำการวัดค่า ถ้าได้ค่ามากกว่าที่ manual กำหนดแสดงว่าแหวนหลวมอันนี้ก็จะใช้ไม่ได้ต้องเปลี่ยนใหม่ ถ้าได้ค่าน้อยกว่าค่ากำหนดอันนี้ช่างจะต้องทำการปรับแต่งระยะห่างใหม่เพื่อ ให้แหวนมีขนาดพอดีกับกระบอกสูบครับ

ในส่วนของแหวนลูกสูบนั้นยังต้องมีการวัดค่า clearance ระหว่างตัวแหวนกับร่องที่ลูกสูบอีกโดยจะวัดที่แหวนอัดทั้งสองตัวโดยใช้ thickness gauge เช่นกันครับ ค่ามาตรฐานก็พิจารณาจาก manual อีกเช่นเคย


ส่วนเรื่องการวัดขนาดในส่วนอื่นๆ ผมขอข้ามไปนะครับเพราะมันยังมีอีกมากเหลาทั้งวันก็ไม่หมด แต่ในกระทู้นี้มันไม่เป็นประเด็นเลยไม่ขอกล่าวถึงครับ

ต่อมาในขั้นตอนของการประกอบ สมมติว่าชิ้นส่วนทุกอย่างวัดขนาดแล้วอยู่ในเกณฑ์ทั้งหมดช่างก็จะทำการประกอบ ชิ้นส่วน ซึ่งในส่วนของแหวนลูกสูบนั้นช่างจะต้องทำการจัดตำแหน่งปากแหวนของแหวนทั้ง สามตัวให้ได้ตำแหน่งตามที่ manual กำหนดไว้ ถ้าช่างจัดตำแหน่งปากแหวนไม่ถูกต้องถึงแม้ว่าขนาดของแหวนจะถูกต้องแต่กำลัง อัดก็อาจจะรั่วไหลได้ครับเพราะมันรั่วไปตามปากแหวนนี่แหละครับ หรือไม่ก็อาจทำให้มีน้ำมันเครื่องตกค้างในกระบอกสูบจนเกิดควันขาวได้ครับ

จบแล้วครับ ถ้าใครอ่านจนจบจะเห็นภาพของเรื่องนี้ และประเมินได้เลยครับว่าเรื่องนี้มีสิ่งผิดปกติที่ตรงไหน

เคยได้ยินไหมครับว่าใช้ของเหมือนกันอู่หนึ่งทำแล้ววิ่งดี อีกอู่ทำแล้วพังทั้งๆ ที่มันเป็นสเต็ปเดียวกันใช้ของเหมือนกัน เคล็ดลับมันอยู่ที่คนประกอบนี่แหละครับ ละเอียดแค่ไหน ใส่ใจกับงานแค่ไหน ถ้าประกอบเครื่องแล้ว clearance ทุกจุดได้เป๊ะๆ มันก็จะวิ่งได้ตามประสิทธิภาพที่ควรจะเป็นของอุปกรณ์ที่ใช้ครับ (ยกเรื่องการปรับจูนเป็นคนละประเด็นนะครับ) อีกอย่างก็คือพอจะทราบแล้วใช่ไหมว่าทำไมอู่ที่ได้มาตรฐานถึงต้องประกอบ เครื่องในห้องแอร์ เพราะนอกจากเรื่องความสะอาดปลอดฝุ่นแล้วก็เป็นเรื่องของการวัดขนาดนี่แหละ ครับ


จบแล้วจริงๆ ครับ


ขอให้ท่านผู้อ่านโชคดี เจออู่ดี ช่างเก่ง ไม่มักง่าย เครื่องไม่พัง

1970-pontiac-firebird

from http://www.egarage.com/car-profiles/1970-pontiac-firebird/

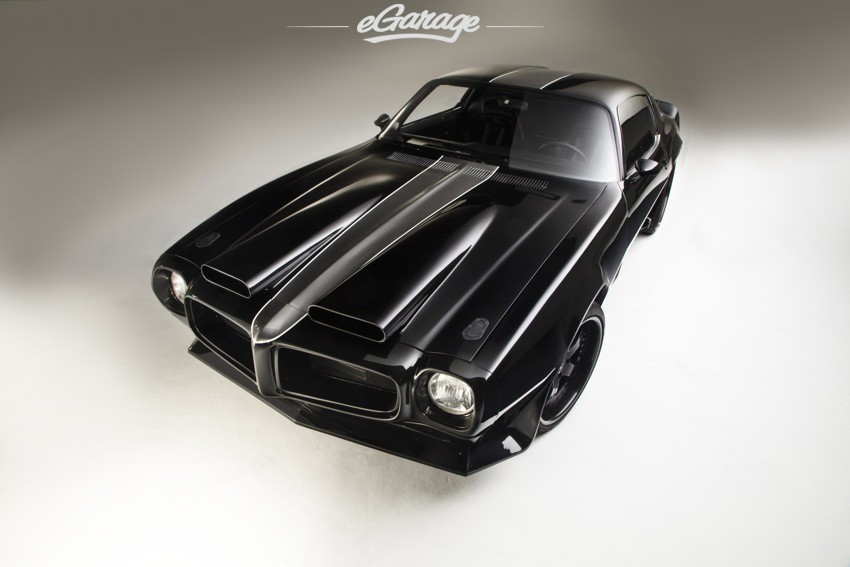
1970 firebird ASC 1970 Pontiac Firebird
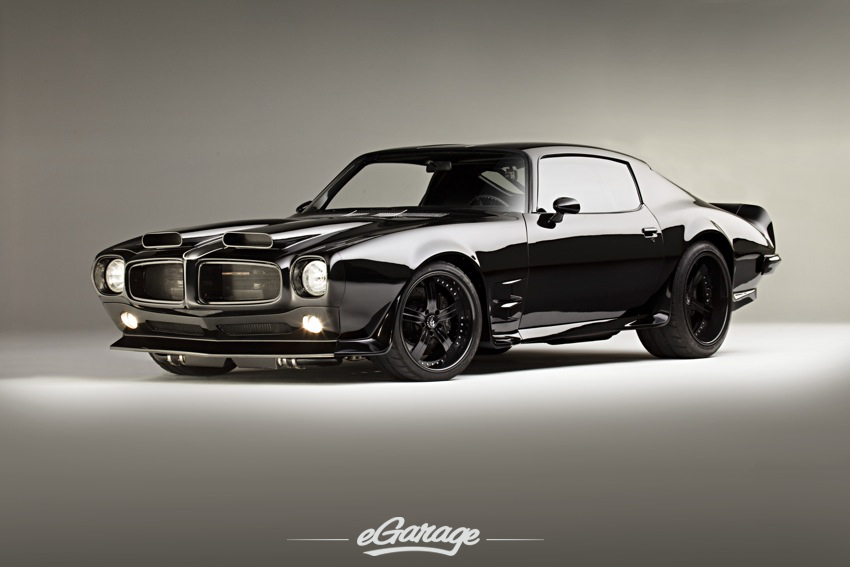
“When I set out to build my dream car the vision was to tastefully integrate modern styling and technology into the classic 1970 Pontiac Formula Firebird body.  Built as a high-performance daily driver, this Firebird needed to include many luxuries and appointments found in late model sports cars such as a tuned suspension, fuel injected adjustable twin-turbos, climate control, power windows with a state-of-the art stereo and multimedia electronics.”
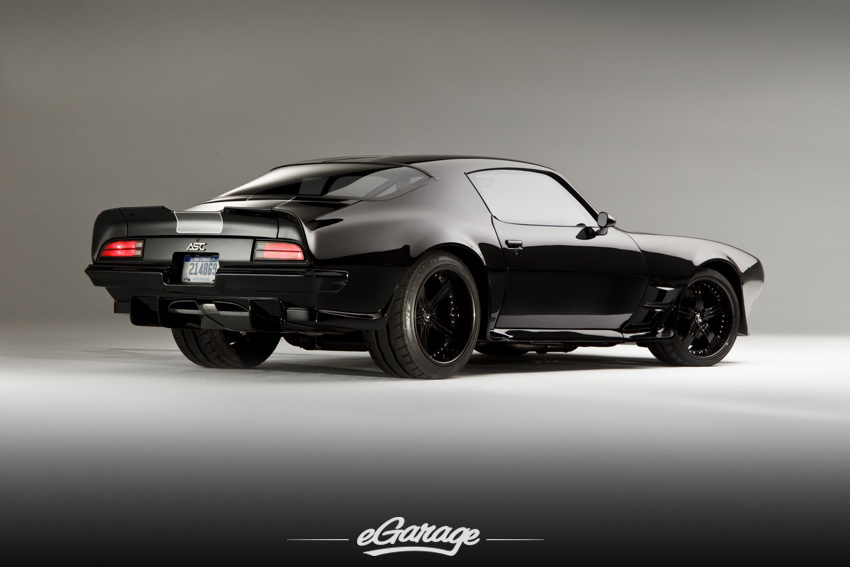
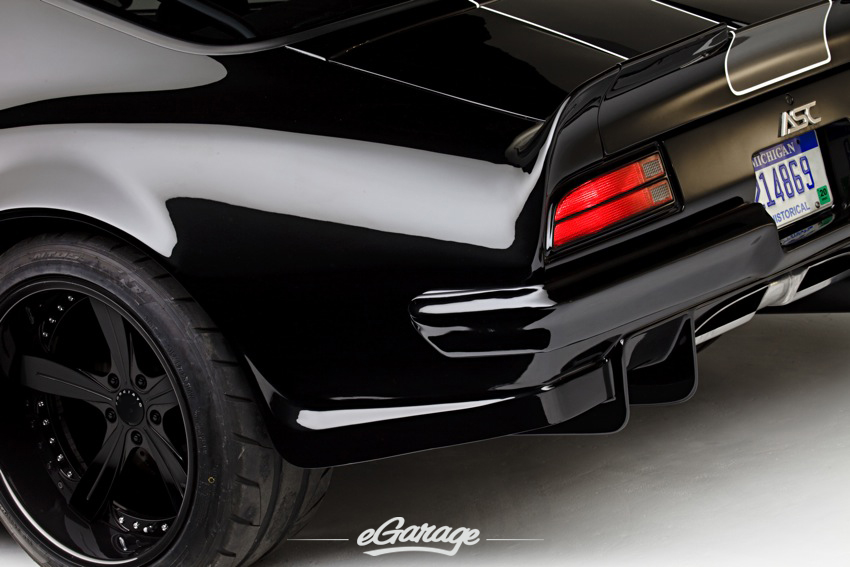
1970 firebird rear 1970 Pontiac Firebird
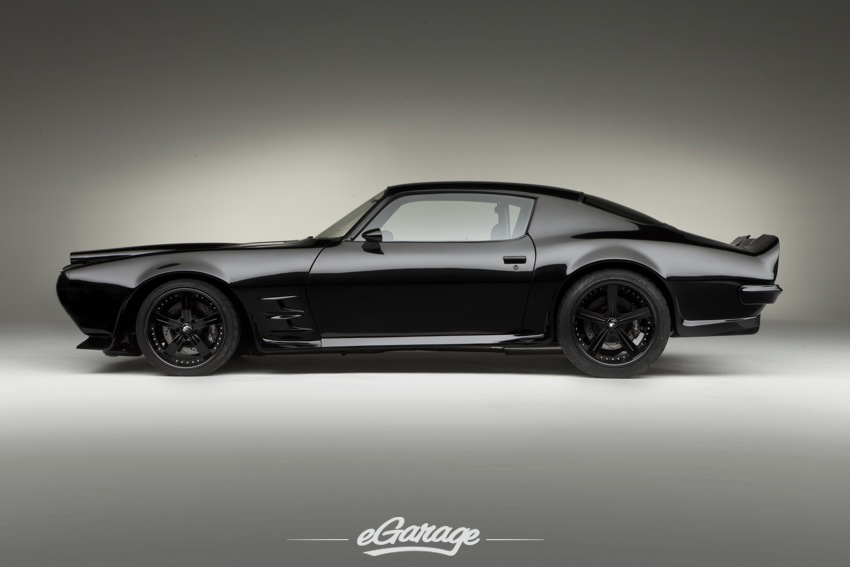
The body modifications provide a contemporary yet bold look and will increase performance by managing and directing airflow. Plus there is an enormous amount of black. Although this Machine of muscle might appear to be a garage happy show car, it has lots of wear and tear with both street and track miles.
1970 firebird 1970 Pontiac Firebird
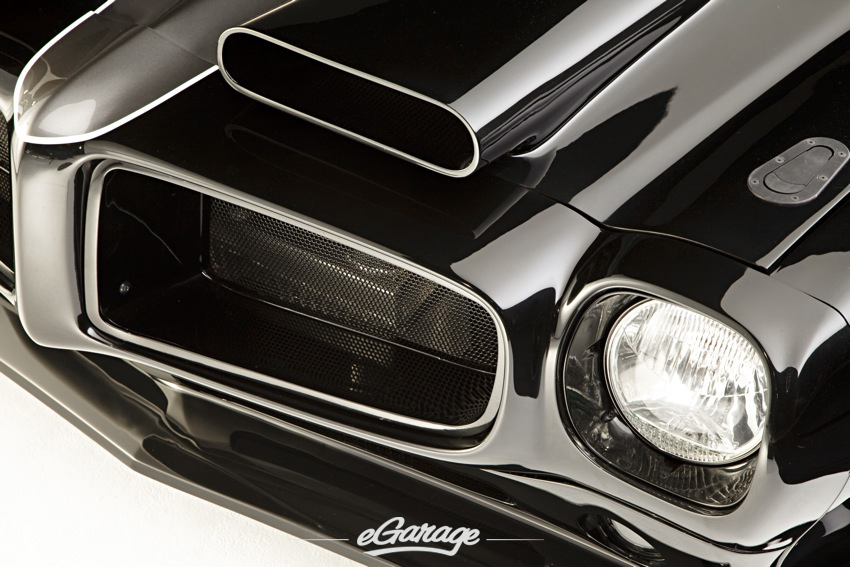
1970 firebird hood 1970 Pontiac Firebird
Nearly 2 decades ago, owner Tom Cronkright’s first car as a juvenile was a 1970 Pontiac Firebird, but his spirited youth combined with a heavy right foot shortened that relationship. This latest 1970 Firebird stretches its 1200hp wings with the help of Brian Moat/All Speed Customs, based in Muskegon Heights, Michigan – where the muscle car has the proper pedigree for a build of this nature.
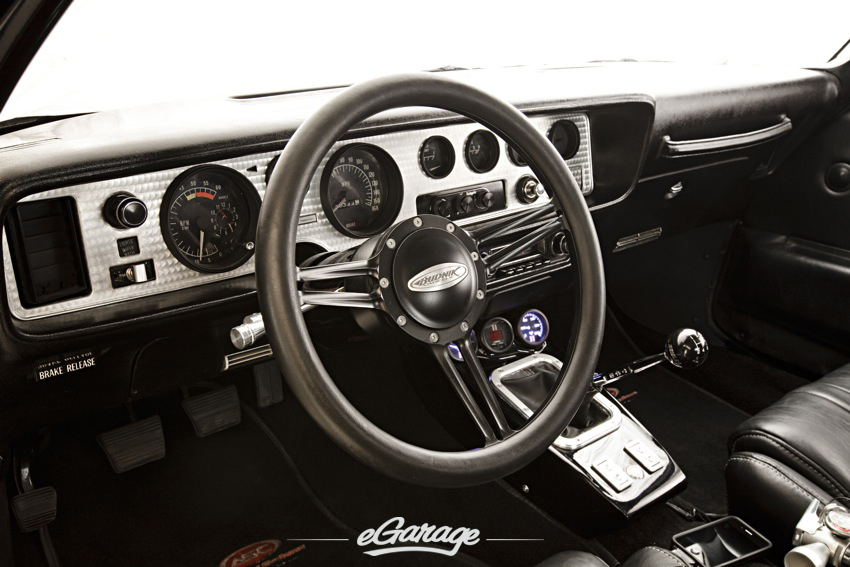
1970 firebird Budnik steering wheel 1970 Pontiac Firebird
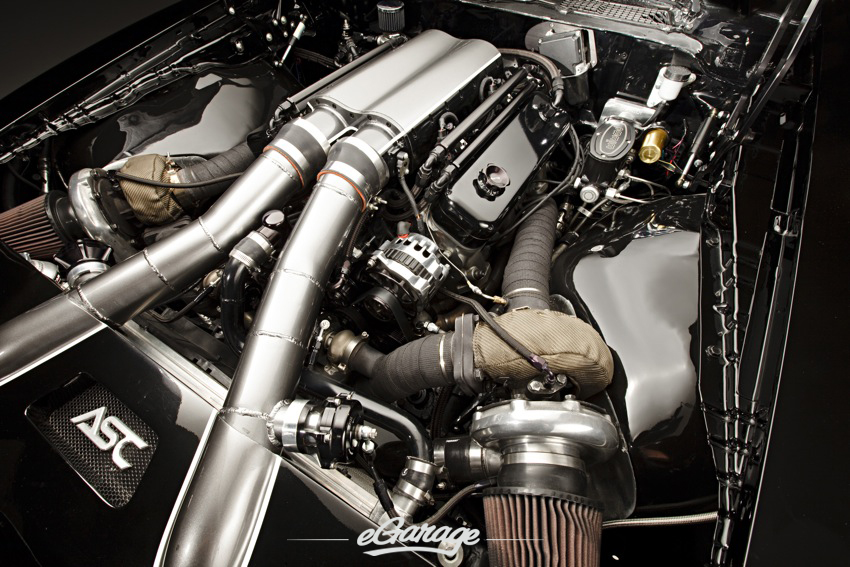
ENGINE: 475 Cu. In. Custom Twin Turbo Pontiac
Block – IAII cast iron 4.250″ bore.
Mains – billet 3.00″ splayed mains,
Crank – 4.00″ stroke crank – Scat 4340 forged steel
1970 firebird engine 1970 Pontiac Firebird
TURBO SYSTEM – Custom All Speed Performance Twin
2 ea. Bullseye Power 62 mm extended tip turbos with polished race covers
2 ea. Tial 44 MM v-band wastegates
2 ea. Tial 50 MM blowoff valves
Custom air to air intercooler with aluminum charge tubing
Custom air hat with retro-Pontiac six pack design
1970 firebird interior1 1970 Pontiac Firebird
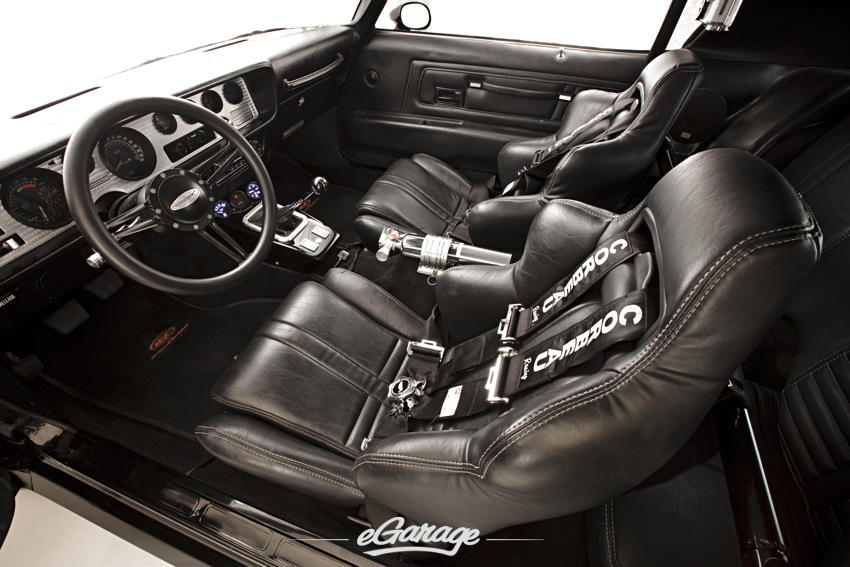
INTERIOR:
Custom design full leather interior with dual stitching
Front leather Corbeau bucket seats
Five point safety harness
Rear bench with molded buckets
Custom center console
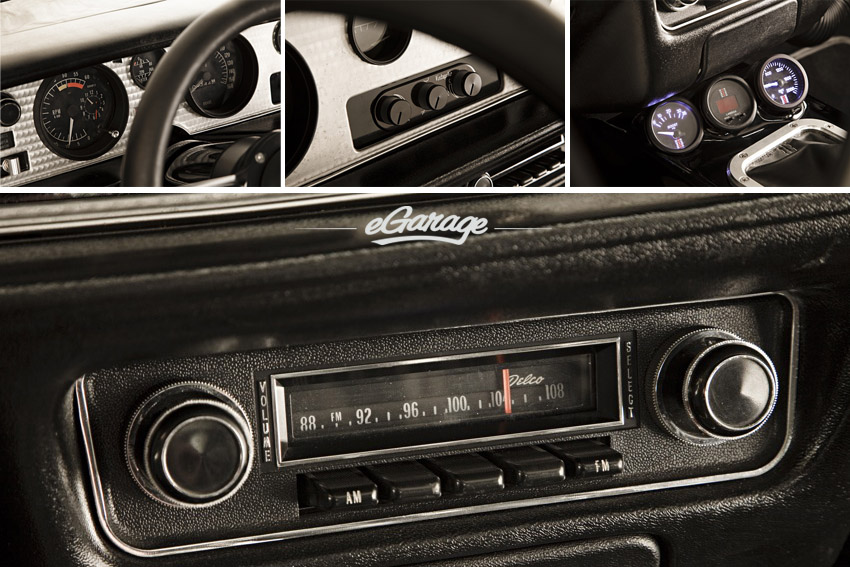
Original-reconditioned Trans Am gauges
New aluminum Trans Am dash plate
Power windows with billet switches
Custom billet door handles
Custom Budnik split-grip sport wheel anodized black
Vintage Air Sure Fit climate control system
Ididit tilt steering column/keyless ignition
1970 firebird features 1970 Pontiac Firebird
SUSPENSION and BRAKES:
DSE tubular upper and lower control arms with 2 ½” drop
DSE 600 performance steering gear
DSE tubular tie rod adjusters
QA1 adjustable coilovers
DSE rear Quadra Link suspension with adjustable coilovers and 3” drop
Wilwood 6 piston calipers with 14” drilled and slotted front rotors
Wilwood 4 piston calipers with 14”drilled and slotted rear rotors
1970 firebird rear tires 1970 Pontiac Firebird
WHEELS and TIRES:
Aluminum performance 3-piece wheels 20×12.5 rear and 19×10 front
High performance front and rear tires
1970 asc firebird  1970 Pontiac Firebird
the images have been brought to you by: SUN TITLE  SEE MORE PICS ON flickr:
1970 ASC Firebird 1970 Pontiac Firebird

วันอาทิตย์ที่ 18 มีนาคม พ.ศ. 2555

Moti's R1 powered (+Miata parts) track build

http://www.locostusa.com/forums/viewtopic.php?f=35&t=2837

There's a Caterham logo visible on the bottom, it will be filled in.
IMG_3860w.jpg

DEFWSH DRIFT Extreme Hillclimb


This was a closed off road Hill Climb run by Rotorua Car Club. Big thanks to them for letting me do this.
There will be more of these hill climb videos to come. They are twice as intense as drifting on the track, got to love the adrenalin. We only got four runs up the hill all day which made it hard to get all the camera angles that we wanted but it worked out sweet.

I've got a turbo package to put in thanks to South East Power Systems, Tial and AirWerks. That should be in the car within a month or so hopefully, then it'll be a different ball game.
Check out "DEFWSH DRIFT" on Facebook to keep in touch.
I'm currently looking for a naming writes sponser for the up and coming Drift Season. There's some awesome advertising opportunities for extremely cheap going so contact me by email if your interested "nebzdriftn7@gmail.com".
Please share this video.


Hitting the wall 182kph
In car Accident with Steve Rossen at 4&Rotary National 29th January 2012 at Meremere Dragway New Zealand. With our previous PB of 7.677 @ 173mph we arrived at the event with high hopes.

This is our second pass of the day after a straight 7.7 on a cold track and were the fastest qualifier. We turned up the boost..
Nek Minnit

This car also won best Drag Car at the show the day before.

Massive thanks to our pit crew Wayne, Tyrone, Truby, Paul, Mel, John, Heidi Andy & Alex - It just simply not possible to go this fast without their help.

Thanks also to Craig Matthews for the side line footage.

http://youtu.be/30z1_VNBllo

วันเสาร์ที่ 17 มีนาคม พ.ศ. 2555

BUILDS>> CLASSIC FORD MAG: TEAM DARKHORSE DRIFT 100E

1BUILDS>>
CLASSIC FORD MAG: TEAM DARKHORSE DRIFT 100E


from http://speedhunters.com/archive/2012/03/15/builds-gt-gt-classic-ford-magazine-team-darkhorse-drift-ford100e.aspx
 

Like walking into the door frame of your bedroom, this 100E is so painfully obvious it's a wonder it's not been done before. But there in lies it's beauty for us, Classic Ford magazine showcased this build being undertaken in Worcester, England by Mark 'Hux' Huxley of Huxley Motorsport and we wanted to see more.


Hux has been running his own restoration, tuning and fabrication shop since July 2009 after it out grew hobby status. Last year he ran his 250bhp, SR20 powered KE70 Corolla in the British Drift Championship and he'll be back for more in 2011. Interestingly enough, the Toyota runs a Hi-Lux back axle, common in Australia and NZ maybe but yet to fully catch on over in the UK. You can see the Corolla in action thanks to Stephen Brooks excellent 2011 round up video.


So we've established he knows a thing or ten about building a retro based project. So if it's not been built before, why is this 100E so obvious? To classic Ford fans the world over the theory behind fitting a larger capacity engine and going sideways is nothing new, couple that with the advent of drifting and the increased awareness of what can be done to a car to increase lock/steering angle and it would all seem to be so formulaic.


Take a look at the engine and you start to see the differences in this project, it's not just a Pinto engine, it's an alloy block, Cosworth cast Pinto displacing 2.2ltrs.


Sucking in molecules through a pair of brand new twin 45 Webers. Old school maybe, but very much at the top of the class. This project has got some high profile sponsors, the engine for one coming from Burton Power. Renowned tuners in the Ford scene, they've also helped out with plenty of other parts like the five-link kit and roller top mounts.


Tran-X have come on board too with a four speed box, in fact the whole drive train is built as strong as it can be to withstand the complete abuse that is to come.

So just how potent is it going to be? Well Hux is aiming for over 70 degrees of lock...


With an all up weight of somewhere around 700kgs and a power figure of 218bhp, that weight will be in all the right places thanks to the enlarged trans tunnel enabling the engine to be mounted right back.


The attention to detail put in to this build is what really sets it apart and another reason why we haven't seen something like this before.
Hux is in to cars, not just classic Fords, although he'd had a fair few of them. So he's approached this build with the eye and mind of a car guy, making everything work whilst not following a formula that's been brewed before.

Okay so you'd be right in thinking we're not looking at anything ground breaking here, take every step on its own and you can feel comfortable, maybe you've taken it yourself? Put them all together and it becomes something greater than the sum of the parts. Built for drift, drag and whatever the owner wants to throw at it, this little 100E is going to show that the classic Ford scene is alive and fighting into the new era.


As you were.
-Bryn Musselwhite
Photos: Classic Ford Magazine

วันจันทร์ที่ 12 มีนาคม พ.ศ. 2555

HIBINO'S D1 TOYOTA 86 PT.2

 from http://speedhunters.com/archive/2012/03/07/hibino-s-d1-toyota-86-gt-gt-the-build-pt-2.aspx

HIBINO'S D1 TOYOTA 86 PT.2

It's time to finish up taking a look at what has so far been the most extreme Toyota 86 build we have come across, and again many thanks have to go to Ross at AVO Japan, Paul at AVO America, Droo-P, Up Garage and all the other companies involved in the build of Hibino's 2012 D1 car.

You can see that the car is still wearing the Falken livery that was quickly done back in January when it was, in stock form, driven at the D1 Exhibition during the Tokyo Auto Salon. The body, along with probably the coloring, might change but we won't find out until next month...

...so let's concentrate on the more evident details starting off inside. Like we saw in Part 1 the interior has been completely stripped out and modified in specific areas like the transmission tunnel, boxed out in order to fit the Hollinger sequential.

A custom linkage has been made for the shifter seeing the racing gearbox is far shorter and more compact than the stock unit. This of course also called for a modified propeller shaft but more on that further down.

Here is a detail of the custom roll cage, gussets welded on to the B-pillars. Some of you noticed how the construction of the roll-cage differs to some of the more complex cages that are built in drift or race cars abroad. D1 doesn't specify any guidelines to roll-cage construction so it's up to the tuner to fabricate what he sees as the best cage for the application.

The AVO guys were also busy at work on the dashboard, which was removed to make it easier to fabricate the custom switch panel for the center console...

...and the carbon fiber backing plate onto which the Link LCD dash unit and data logger would be fitted onto.

There you go, perfect fit!

These are the braided fuel lines that pop out through the bulkhead...

...pass along the transmission tunnel, under the Tilton brake bias adjuster...

...and right into the trunk. As you can see above, the stock fuel tank has been retained, with two upgraded in-tank fuel pumps sending the high-octane juice...

...to the collector tank in the trunk. The fuel is cooled through a little radiator...

...as well as this bucket-type cooler which is filled with ice, or even dry ice.

The big Optima Yellow Top battery has been fitted centrally in the back of the 86, where the stock rear seats would be.

With most work almost complete it was the custom wiring loom that needed to be fitted and laid out around the chassis next.

This is the mess of wires that are needed to make everything work, all measured and cut to just the right length and grouped together as required.

It's a tedious job and one that calls for years of experience, not to mention lots of patience, which is why...

...John Marsh, or "Crazy Gaijin" as some Japanese started calling him during his time here, from AVO Australia flew up to Japan to take care of it all. He is a specialist in this field and was casually chatting to me while neatly organizing tiny wires together. Crazy stuff!

Here is the almost completed loom!

While I was buzzing around the workshop shooting pix of the 86 and AVO's GDB, Ross had shortened one piece of intercooler piping and was welding on an aluminum plate onto which temperature and pressure sensors would be fitted.

Thankfully there was still a bit of snow left in front of the shop from a few days before which proved to be perfect for cooling the pipe down after welding.

It was then on to drilling up three holes on the plate and threading them, ready to accept the sensors. With all of the tools and machines that AVO have at their fingertips this was all done in the space of ten minutes!

Let's move on and take a look under the rear of the 86. The rear subframe...

...and stock differential housing remain, but have been joined by a lot of other upgrades beginning first with the modified propshaft, and a Cusco 2 Way LSD.

Again from Cusco are the adjustable pillow ball lower arms and traction rods.

Here is a view of one of the rear DG-5 dampers, along with the Swift main spring and smaller helper spring. You can also spot the orange AVO polyurethane stabilizer bush deep inside the lower arm.

Another look at the Cusco parts. Cusco will have a complete lineup of parts available for the Toyota 86 and BRZ available from later on this month so those lucky enough to get their hands on one of these cars will be spoiled for choice from the get go on upgrade parts!

AVO fitted their rear stabilizer reinforcement brackets, a mod I've been wanting to make to my Legacy for a while now. Like on Subarus, the 86's stabilizer mount is made from thin steel plating which bends under stress, throwing off the full effect of the stabilizer bar. This steel plate helps keep things nice and firm, giving a better feel from the rear end, improving things like mid-corner adjustability and turn in.

Like up front, rear braking is handled by Project µ calipers, small 2-pots biting down on larger diameter slotted discs. Last night Ross had the car on the Dynapack hub dynamometer at AVO and did an initial set up of the engine to make things everything was working as it should. The car is on the way back down to Okayama now where the body part of the project will be addressed along with smaller things. Before the car left AVO last night Ross grabbed a shot of the completed engine bay...
 
...not bad right? And to answer some of the questions from Part 1 as to why the Cosworth intake plenum hasn't been rotated 180º, the reason is simple. Ross wanted to do this to keep piping shorter and more direct but this can't be done due to the positioning of the mounting bracket of the Cosworth dry-sump oil pump which is right in the way.
I can't wait to see this thing in action through the tight Odaiba course next month! Don't forget this will be one of three Toyota 86 D1 cars; HKS are busy at work preparing Nob's machine ready for his return into the series and of course there is Orido's 86, powered by the Lexus ISF's 5L V8, which is in the final stages of the build. These cars will no doubt inject much needed excitement into the D1 Grand Prix, which has been struggling for years to attract the same big numbers of spectators it used to during its heyday.

Up Garage
Droo-P
AVO Turboworld
Cosworth
Hibino's D1 Toyota 86 build Part. 1

-Dino Dalle Carbonare